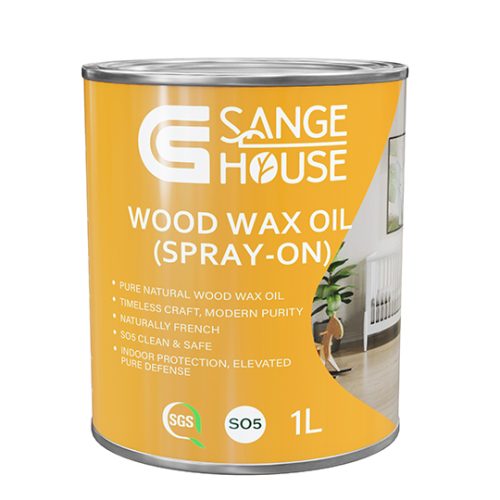
WOOD WAX OIL(SPRAY-ON)
Crafted from pure plant oils and natural waxes, Sange House wood wax oil (wipe-on) offers a safe, eco-friendly way to care for your wood.
It creates a silky, breathable finish that resists water and everyday stains—protecting against wine, coffee, juice, and more—without compromising the wood’s integrity.
Sange House wood wax oil (wipe-on) will never peel or blister. Instead, it penetrates deeply to preserve and enhance the wood’s natural elegance, offering lasting protection from the inside out.
Capacity: 1 L
Application Scope:
Wood furniture, wooden floors, wooden doors and windows, wooden stairs, etc.
Product Description
Instructions
Suitable surface:
Untreated and oiled woods.
Surface requirements:
The surface must be dry and free of dust and grease.
Thinner:
The Sange House wood wax oil (wipe-on) comes ready for use. lf necessary use biopin Thinner or turpentine oil.
Application:
Trough painting or immersion. The Sange House wood wax oil (wipe-on) only use if temperature is above 8°C.
Preparation:
Clean highly-resinous and tropical woods with bio pin Thinner.
Prime coat:
Apply 2-4 layers (depending on penetration) of bio pin Workbench Hard Oil until the material is completely saturated. Remove any excess oil after about 15 minutes and leave to dry well before applying new coat.
Finishing coat:
Surfaces must be treated with Hard Oil surface finish. Sand surfaces with fine-grain sanding paper or pad, remove dust and evenly apply one thin layer of bio pin Workbench Hard Oil. Buff oil with cloth after short waiting time (max. 15 min.).
Touching up of Oiled surfaces:
Clean worn or damaged surfaces, sand lightly and apply new finish.
Cleaning and care:
Oiled surfaces must not be cleaned with aggressive cleaning agents.
Cleaning of tools:
Clean all tools with biopin Thinner or turpentine oil.
Application Steps
1. Sanding
Choose the appropriate sandpaper grit based on the wood’s surface texture. For indoor use, 120–600 grit is recommended; for outdoor surfaces, 120–320 grit. For very rough surfaces, start with 100 grit.
(The smoother the surface, the better the finish, the softer the feel—and the less oil you’ll need.)
2. Dust Removal
Wipe away all sanding dust using a clean cloth or brush. Ensure the surface is clean, dry, and free of grease or debris.
3. First Paint
Apply using a cloth (wipe-on), brush, or sprayer. You may add a suitable thinner to adjust viscosity if needed (depending on the product). Apply evenly and thinly, following the direction of the wood grain.
Ensure good ventilation during application to aid drying.
4. Second Paint
Once the first pain is dry and the surface is properly prepped, apply a second thin paint using the same method.
5. Polishing
After the surface is dry, buff with a scouring pad or polishing cloth. This enhances the texture and feel.
6. Final Inspection
Once fully dry, buff again with a polishing cloth or pad to refine the finish.
If the desired sheen or smoothness isn’t achieved, a third coat can be applied.